

How To Download Bash On Ubuntu On Windows
i.ane.thirteen. old Windows 10: Bash on Ubuntu (beta)
The essential system setup
-
What to practice?
-
Notes
-
Install prerequisite: "Bash on Windows"
-
Install prerequisite: Xming Ten Server for Windows
-
Install prerequisite: AFNI and package dependencies
-
Useful setup tips (optional, but recommended)
-
Set up for Bootcamp
-
Evaluate setup/system (important!)
-
Niceify terminal (optional, but goood)
-
Keep up-to-engagement (remember!)
What to practice?
Warning
This version of Linux is no longer supported.
Hither is more than clarification from Microsoft about these updates, including the instructions to "remove and replace" the old Linux– notation that this involves deleting files on the Linux side, so exist certain to backup any files onto the Windows side, as they suggest HERE.
These setup instructions are for the (now out of appointment) beta "Creators Update" version of "Bash on Ubuntu" (BoUoW) for Windows ten. This version of Windows x is known officially as version 1703, released around April, 2017.
For instructions for the more modern and supported "Fall Creators Update" version of WSL, please see the instructions HERE.
Notes
Some general background information information is provided in their 'Nearly' folio. The installed version of Ubuntu is sixteen.04.
Annotation
This adequacy is a very recent development on Windows systems, and we are just starting to really test out running AFNI and SUMA through it. Right at present, most major functionality seems to work, though in some cases graphics tin be boring. We would withal recommend Linux or Mac systems for large-scale processing at this fourth dimension.
At present, "re-create+paste" functionality into the default command window works a fleck awkwardly. I should be able to copy/paste by selecting tabs from a drop-downwardly panel in the upper left of the window. (As office of the instructions here, a concluding with nicer interface will exist installed.)
Other operating systems allow for either tcsh or bash shells to be run as default in the last. Yet, the Windows-Ubuntu presently does not appear to allow tcsh as default (perhaps every bit forewarned past its descriptive name…), and therefore we depict the arrangement setup only for staying with bash .
Importantly, as with other installation instructions, you are required to have administrator privileges on your operating organisation.
Install prerequisite: "Fustigate on Windows"
-
Follow the instructions in the outset paragraph Here to get Windows PowerShell up and running.
-
Follow the instructions Here to install "Bash on Windows" from Microsoft. (Requires Admin privileges.)
-
Install
fustigateand Ubuntu on Windows: in the lower left of the Desktop, click on "Ask me annihilation" and type: -
In the command window that opens up, blazon:
and the installation continues. In one case installed,
bashstarts the Linux beat out.
From this point, standard Linux system terminal commands should work (e.g., ls , cp , etc.).
To open up upwards a terminal, you can get to the Search bar in the lower left (where it says "Blazon here to search") and commencement typing "Bash on Ubuntu"– information technology volition likely autocomplete while typing. Additionally, you can make a shortcut on your Windows desktop.
Install prerequisite: Xming X Server for Windows
Click on the following link to start automatic download:
Utilise default installation settings.
To set the Brandish properly, run:
repeat "consign DISPLAY=:0.0" >> ~/. bashrc Note
When you kickoff up your BoUoW, you will need to double-click on the Xming icon in order to first the X Server. (Lamentable, not our fault…)
Install prerequisite: AFNI and package dependencies
Nosotros assume your version of Ubuntu is 16.04, and so you should now follow the post-obit setup instructions through "Make AFNI/SUMA profiles":
| Link to Ubuntu 16+ setup instructions for AFNI |
… while noting the following:
-
The R package installation role might be wearisome, on the order of hours. Meditation is oftentimes a skilful matter, anyways.
-
Include the optional
gnome-terminalinstallation in the first set of steps. -
Then, copy+paste the following into the terminal:
sudo sed - i 's/<listen>.*<\/listen>/<listen>tcp:host=localhost,port=0<\/mind>/' / etc / dbus - 1 / session . conf
Useful setup tips (optional, simply recommended)
-
Install Ubuntu terminal fonts as described Hither.
-
Follow these
gnome-terminalsteps:-
The default profile "use colors from organization theme" shows an all-blackness terminal. To set up this: select the
Edittab, thenProfile, plough off "use colors …", and finally simply pick a scheme+palette that you like. -
In gnome-terminal, everything is standard and similar to other linux implementations, and the centre button pastes whatever is selected in the BoUoW terminal or other gnome-final. Shift-Ctrl-c copies, and Shift-Ctrl-v likewise pastes.
-
-
Similar nigh Linux systems, some things accept to be done with
sudopermissions. The username and countersign may accept aught to practice with their Windows login. To reset the password for userUSER_X, follow these instructions:-
From the default control window, type
Super[windowskey]+X, thenA. Yous can modify the default user to root:lxrun / setdefaultuser root
-
Now BoUoW logs you lot in as root without asking password. To change the user password:
-
Change the default user back to your normal user in Windows command prompt:
lxrun / setdefaultuser USER_X
-
Set up for Bootcamp
-
Copy+paste:
coil - O https : // afni . nimh . nih . gov / pub / dist / edu / information / CD . tgz tar xvzf CD . tgz cd CD tcsh s2 . cp . files . ~ cd ..
Purpose: Download the Bootcamp course information; untar+unzip it (= open information technology up); motility into the newly opened directory; execute a script to copy the files to
$HOME/..If no errors occur in the higher up, and your
afni_system_check.pysays things are OK, you can delete/remove the tarred/zipped package, using "rm CD.tgz". If you are actually confident, you tin also deleted the CD/ directory in the present location. -
!Pro tip!: Bring a calculator mouse to employ at the Bootcamp. It is muuuuch easier to follow the demos that style.
-
Read+practice with the handy Unix documentation/tutorial.
Purpose: requite you a quick lesson/refresher on using bones Linux shell commands (eastward.g., ls, cd, less, etc.). It will profoundly enhance your bootcamp experience– we hope!
Evaluate setup/organisation (important!)
-
Open up a new concluding, and then re-create+paste:
afni_system_check . py - check_all
-
Read the "Please Prepare" section at the end. If there are no suggestions, so rejoice! Otherwise, try the suggestion(southward) at that place.
-
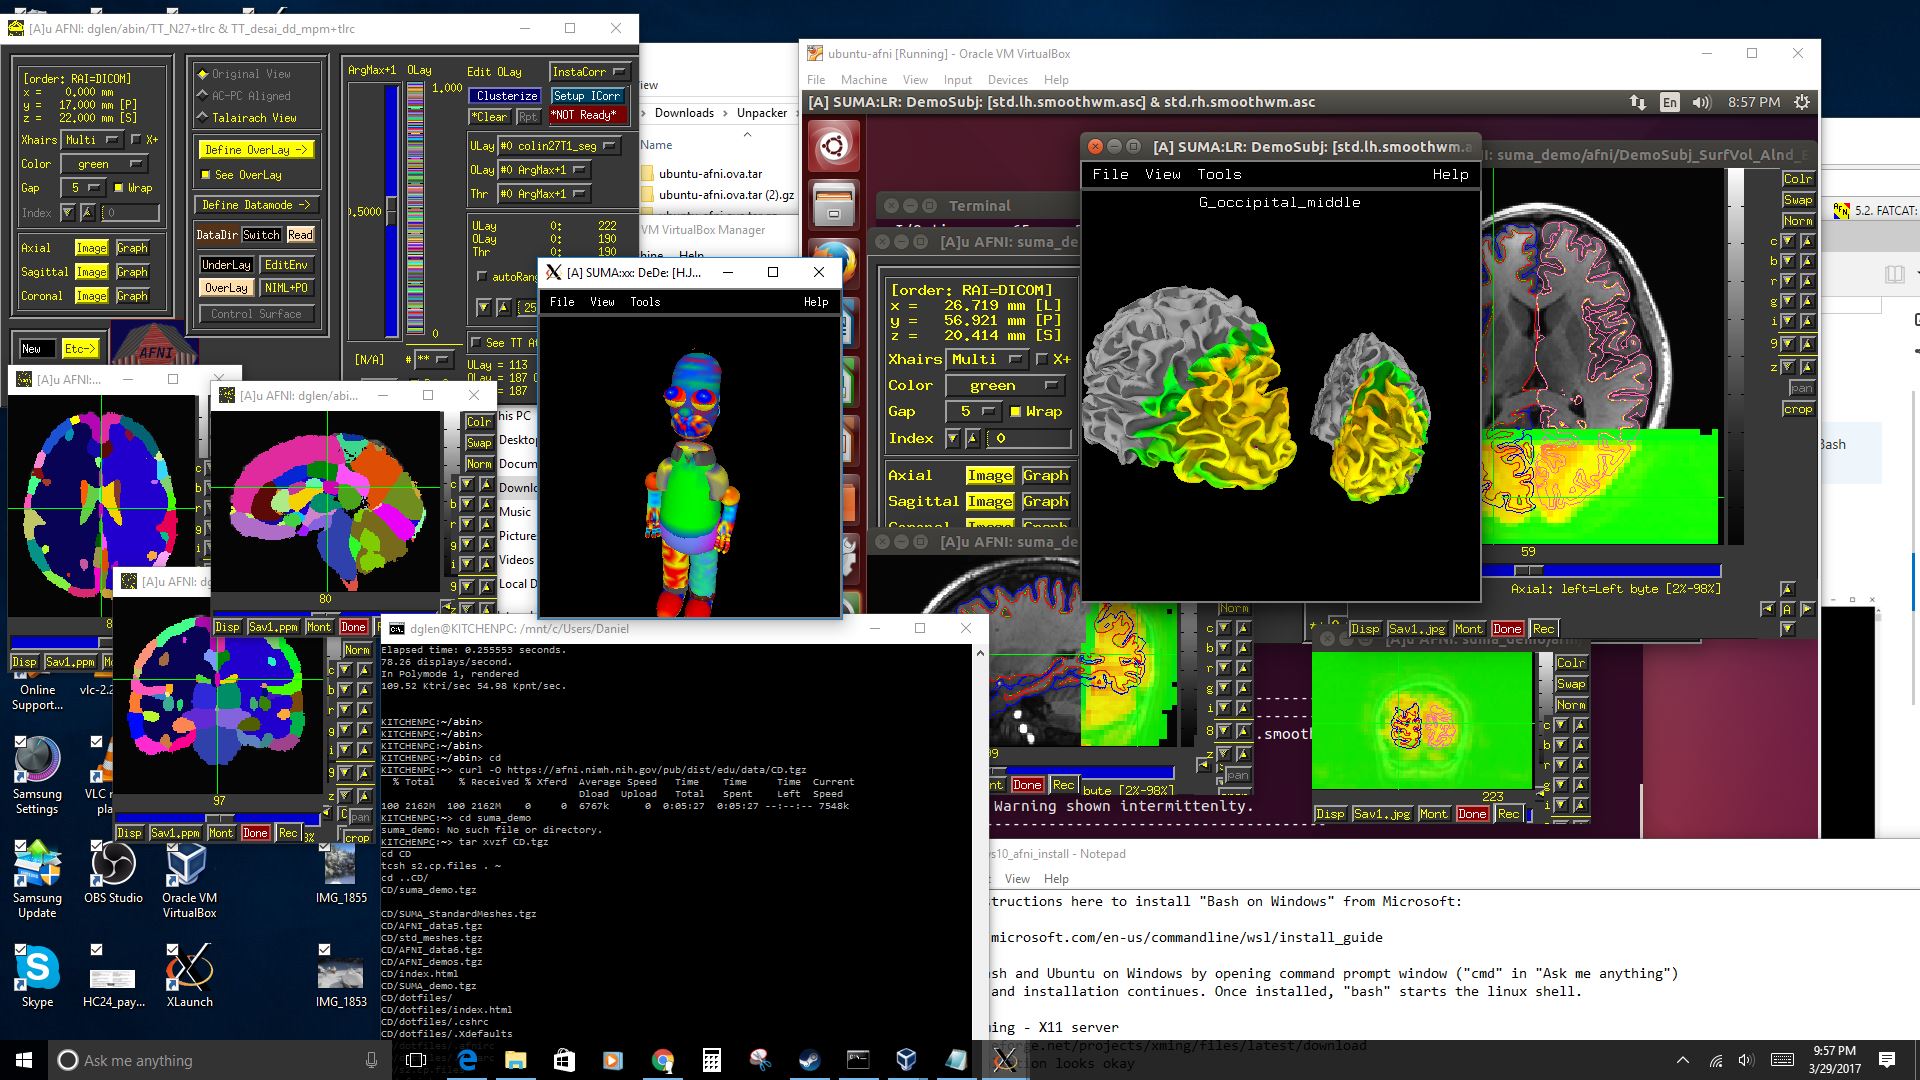
Open upward the AFNI and SUMA GUIs, juuuust to make sure all is well:
Report whatever crashes or issues!
If stuck, then …
-
attempt searching online with the error bulletin, and/or ask on the Message Board
-
ship the system bank check to an AFNI guru for advice—copy+paste:
afni_system_check . py - check_all > out . ASC . txt
... and electronic mail the file "out.ASC.txt".
Niceify terminal (optional, merely goood)
-
To improve your life when using the concluding, copy+paste:
echo 'fix filec' >> ~/. cshrc repeat 'set autolist' >> ~/. cshrc echo 'ready nobeep' >> ~/. cshrc echo 'alias ls ls --color=machine' >> ~/. cshrc echo 'alias ll ls --color -l' >> ~/. cshrc echo 'alias ltr ls --color -ltr' >> ~/. cshrc repeat 'alias ls="ls --color"' >> ~/. bashrc echo 'alias ll="ls --colour -l"' >> ~/. bashrc echo 'alias ltr="ls --colour -ltr"' >> ~/. bashrc
Purpose: The outset commands set upwardly
tabautocompletion fortcsh(which should already exist enabled forbash, past default). The second gear up of commands make aliases so that different types of files ("normal" files, zipped files, executables, et al.) and directories are shown using dissimilar colors and boldness. It makes it much easier to navigate on a terminal, IMHO.
Keep upwards-to-appointment (remember!)
-
To update your AFNI onetime, copy+paste:
That's it!!
Purpose: This will automatically download the correct, latest AFNI version to your figurer, replacing your erstwhile binaries. Information technology will also update the
apearchhelp information. Update often! -
To cheque your AFNI version, copy+paste:
Purpose: Report this useful info whenever request a question on the Message Lath!
Annotation
The record of all changes (new options, new programs, bug fixes, et al.) in AFNI programs is maintained for all to see in the online AFNI History.

How To Download Bash On Ubuntu On Windows,
Source: https://afni.nimh.nih.gov/pub/dist/doc/htmldoc/background_install/install_instructs/steps_windows10_beta.html
Posted by: crawfordstaideadrost.blogspot.com
0 Response to "How To Download Bash On Ubuntu On Windows"
Post a Comment